<br>
#### Week 10: Team Drawing Machine
<span>Mechanical</span>
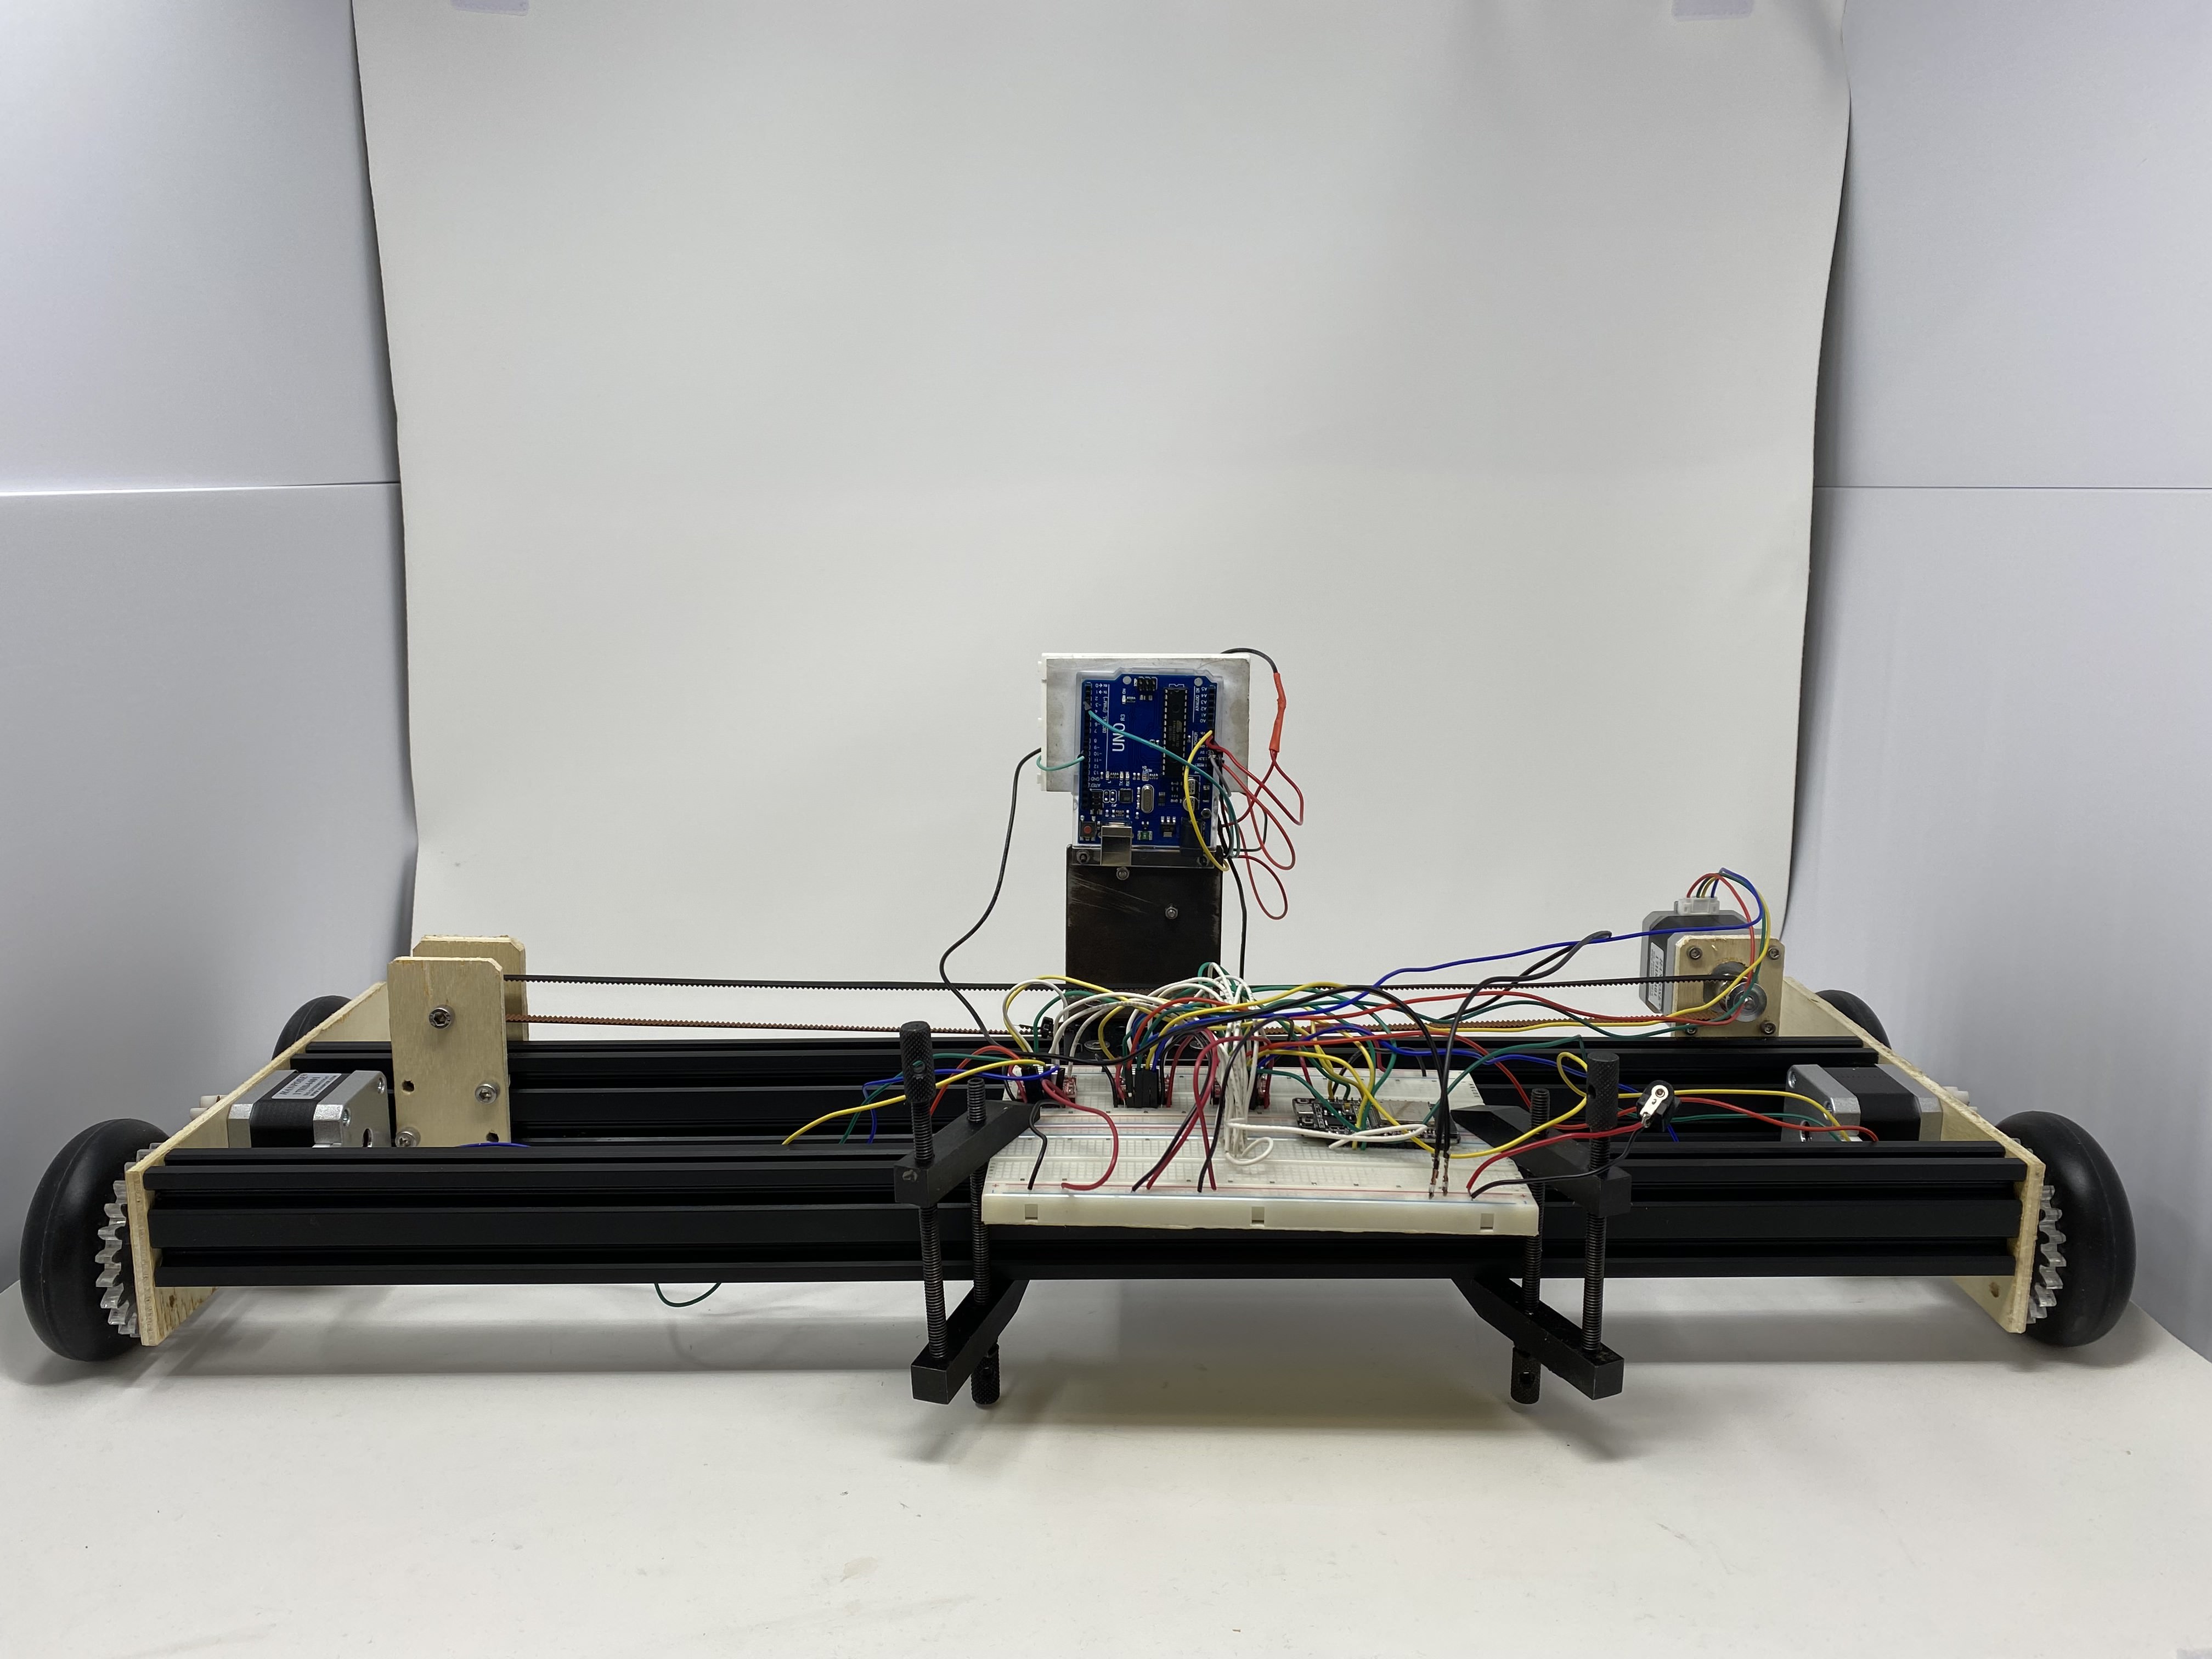
Mechanically, our team decided to design a plotter similar to that of the example plotter (3D model shown below). The plotter consists of 4 wheels, 3 stepper motors, a belt, and the other components are structural to make sure that our system operated with the correct play and that it could be as precise as possible for the electrical team to implement their code.
We decided to cut most of our structural pieces out of wood. This gave our end product a rustic look and we thought that even though there were other materials that might have been sturdier or more durable, cutting wood using the ShopBot got the job done.
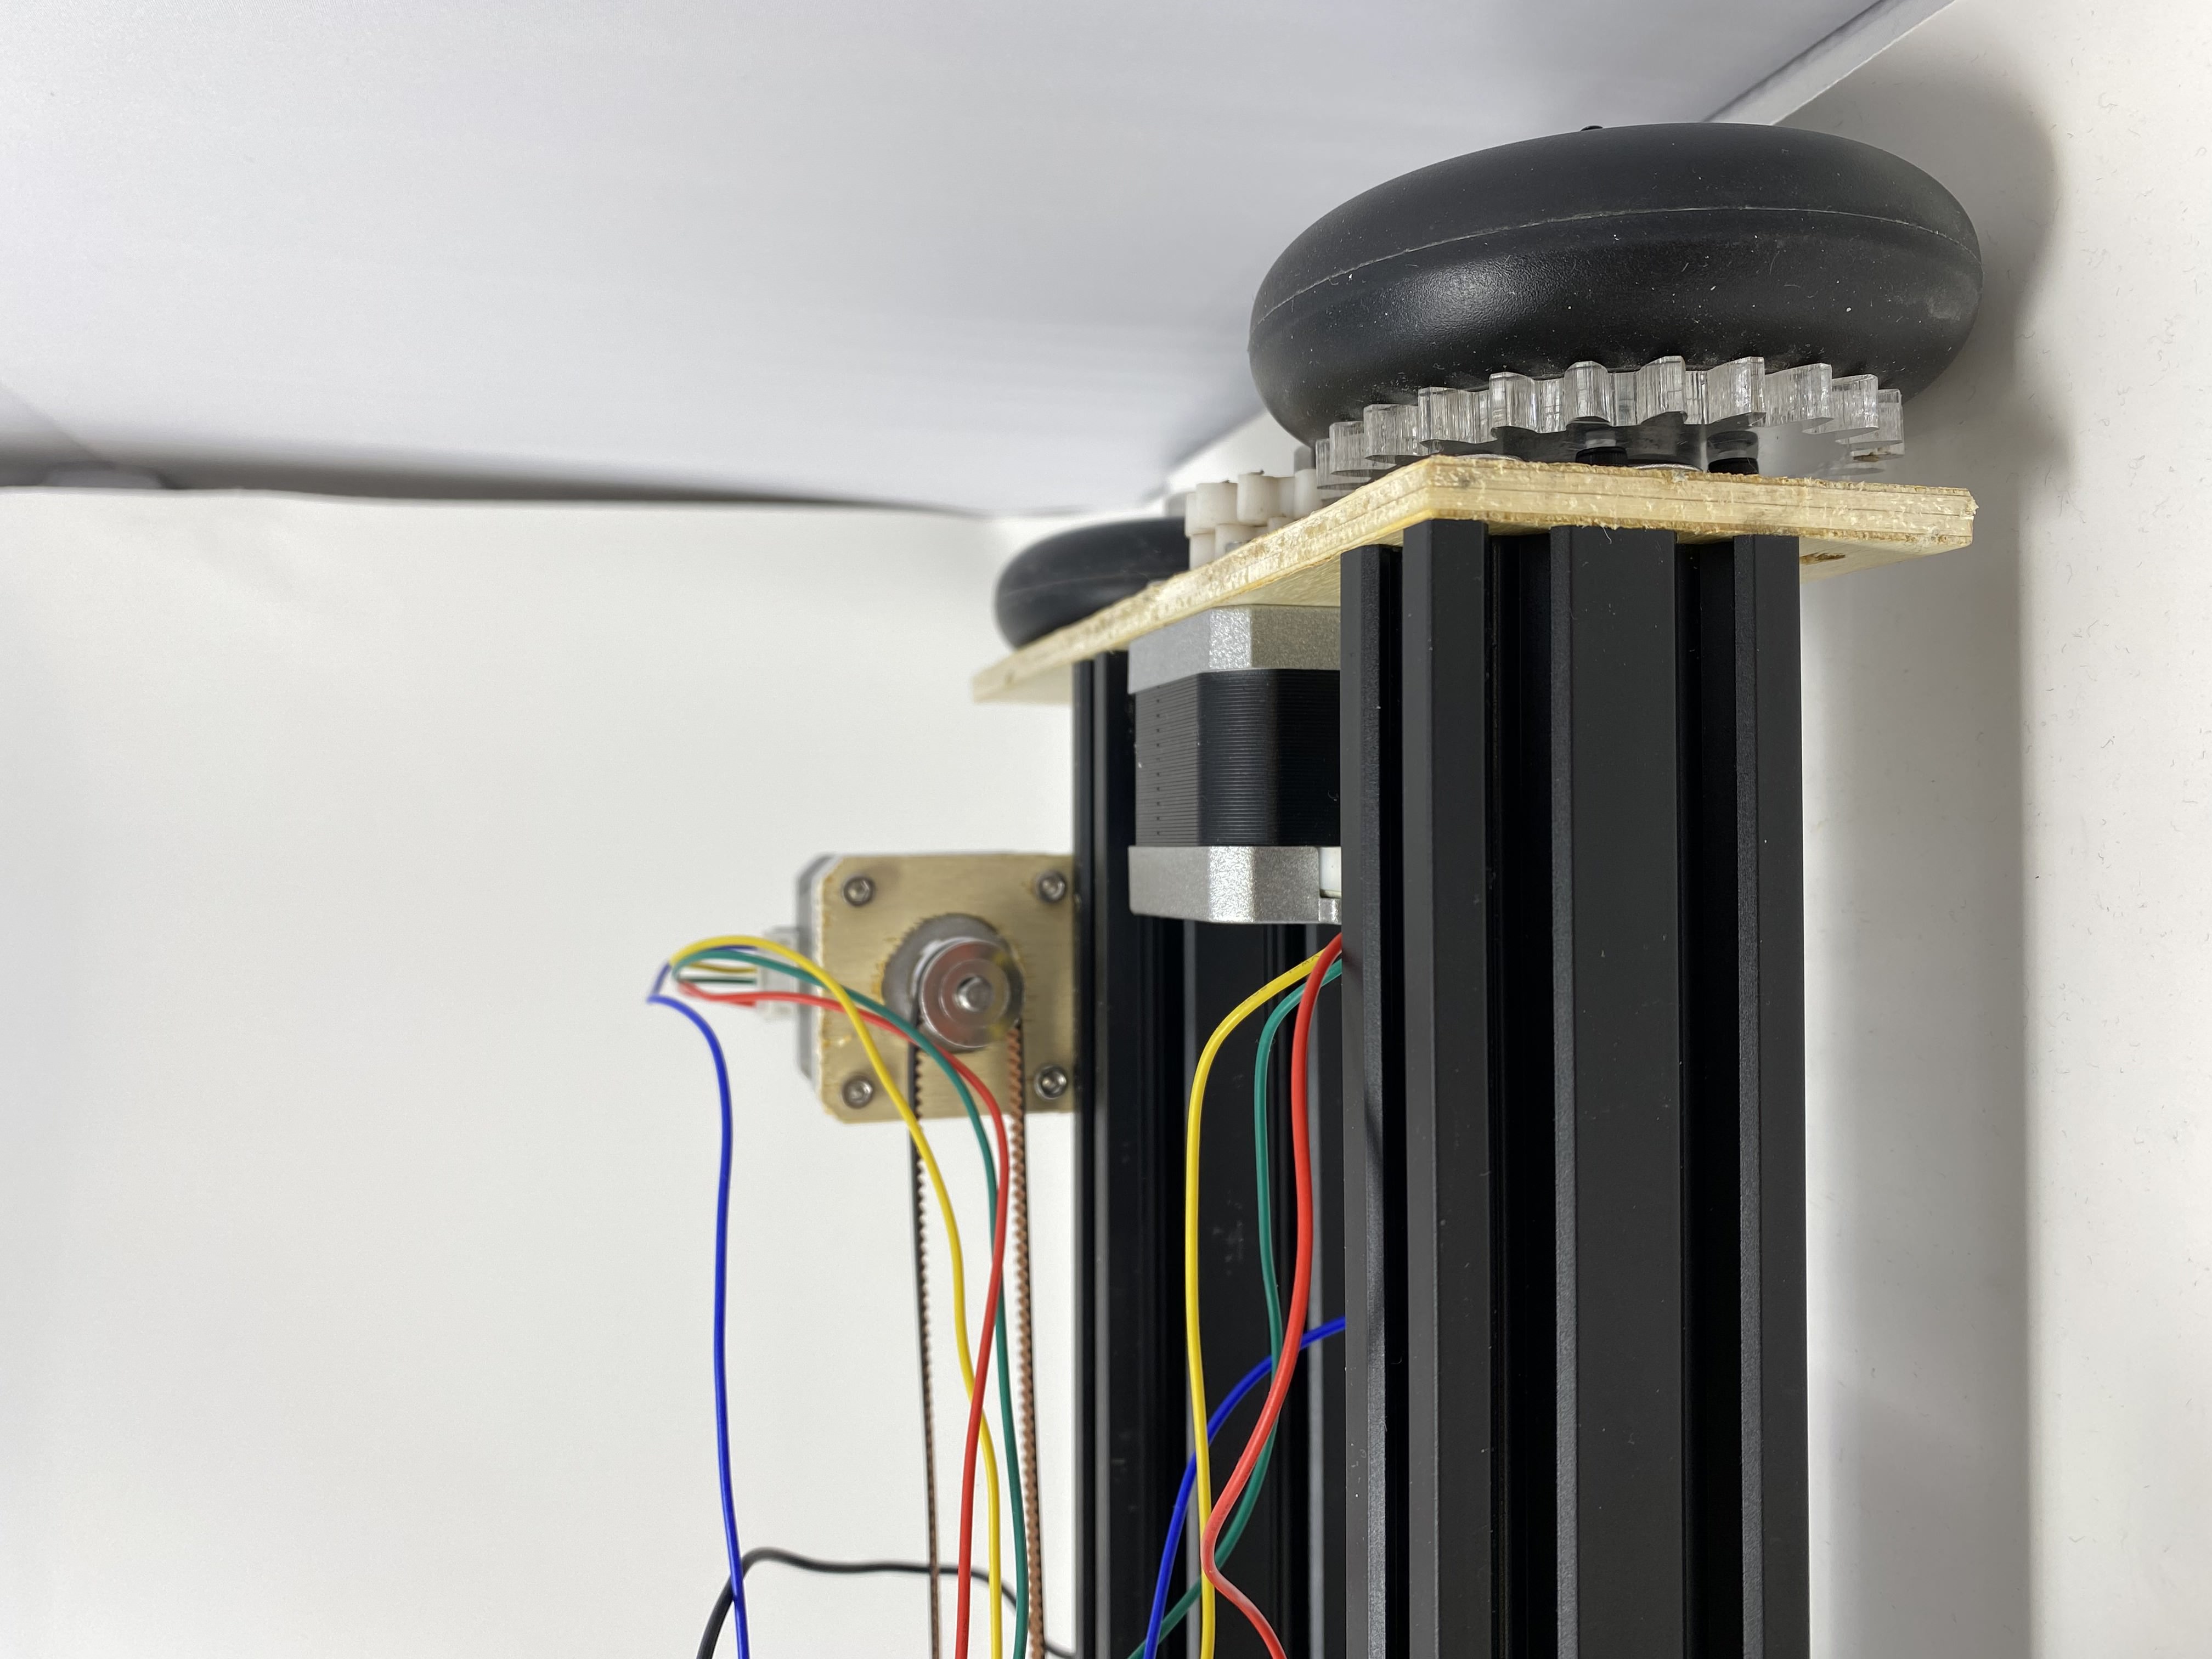
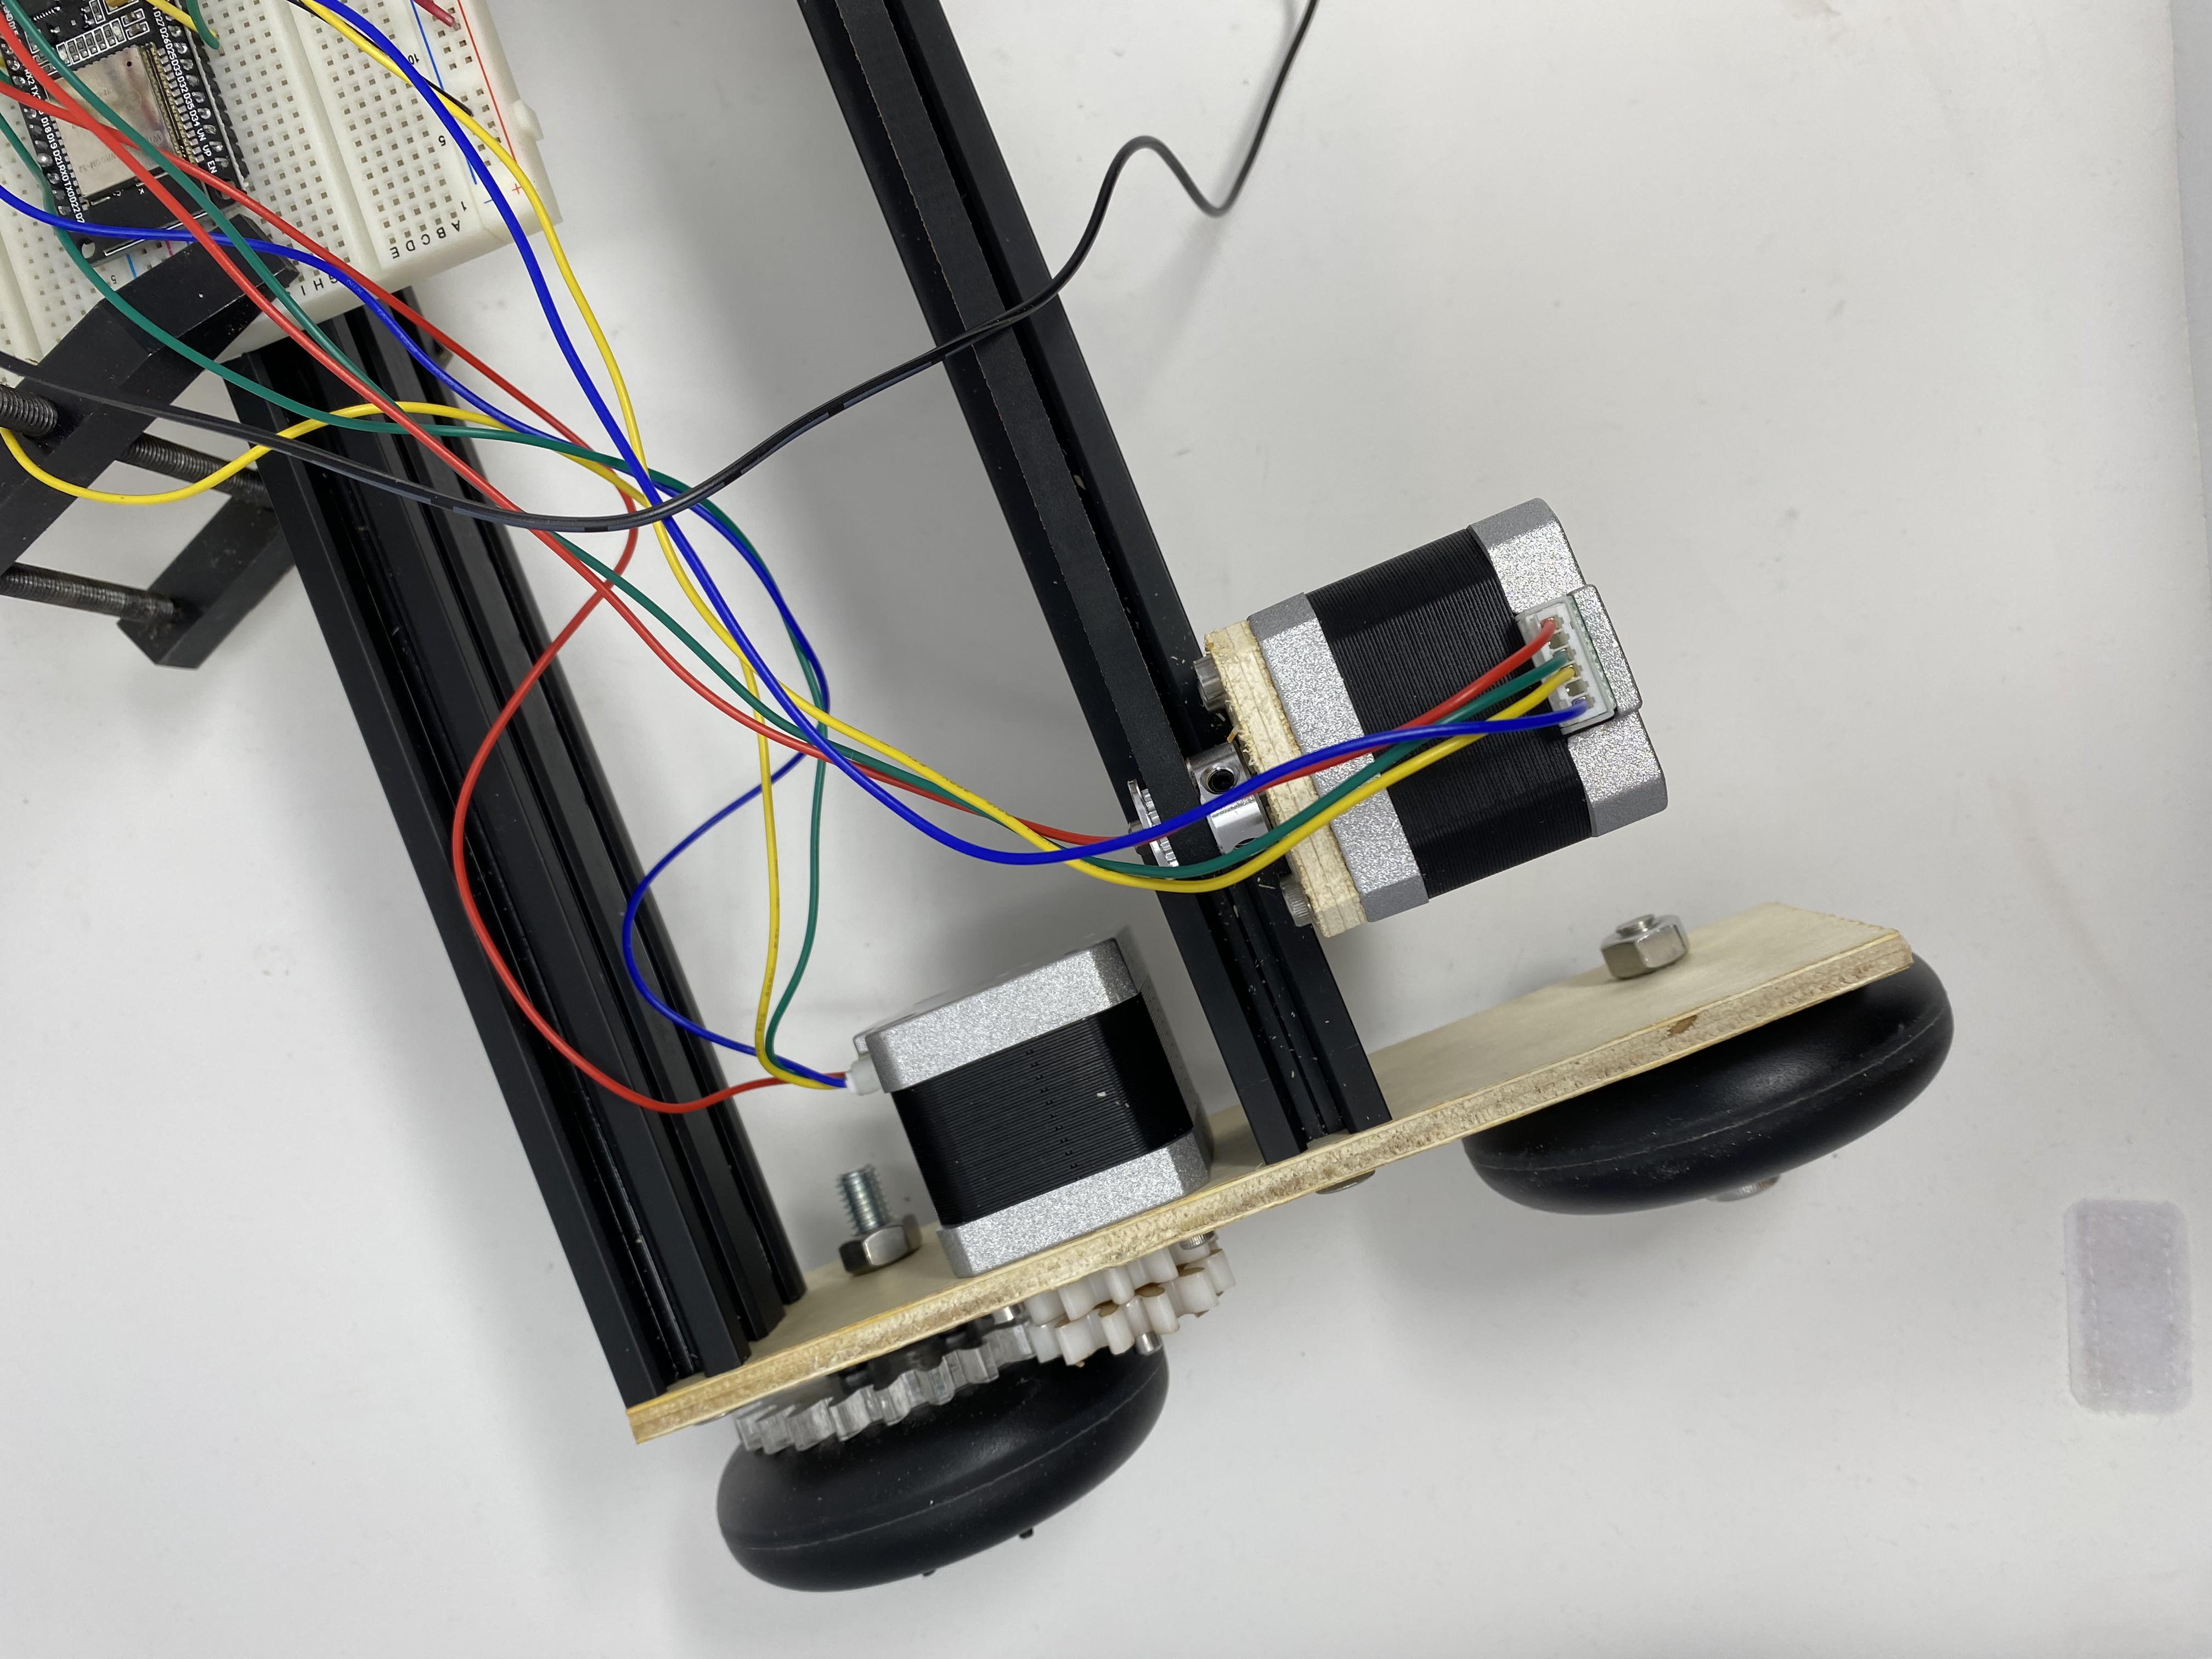
For the wheels, we used laser cut acrylic gears that were mounted on the stepper and secured them to the 2 side stepper motors.
Additionally, we used two 2 foot metal rails to secure the sets of wheels together (like a pallet dolly) and secured the 3rd stepper motor to the side of one rail to act as the pulley for the belt system. We attached the belt so that there was enough tension so the end effector stayed secure, but not too much tension to the point where the end effector couldn’t move.
As for the end effector, Fabian had the brilliant idea to use a solenoid and potentiometer to create a pointillism-inspired dotter. The basic concept is that when the potentiometer is turned to a certain setting, the solenoid rapidly picks the pen up and down on the paper to make dotted lines and images.
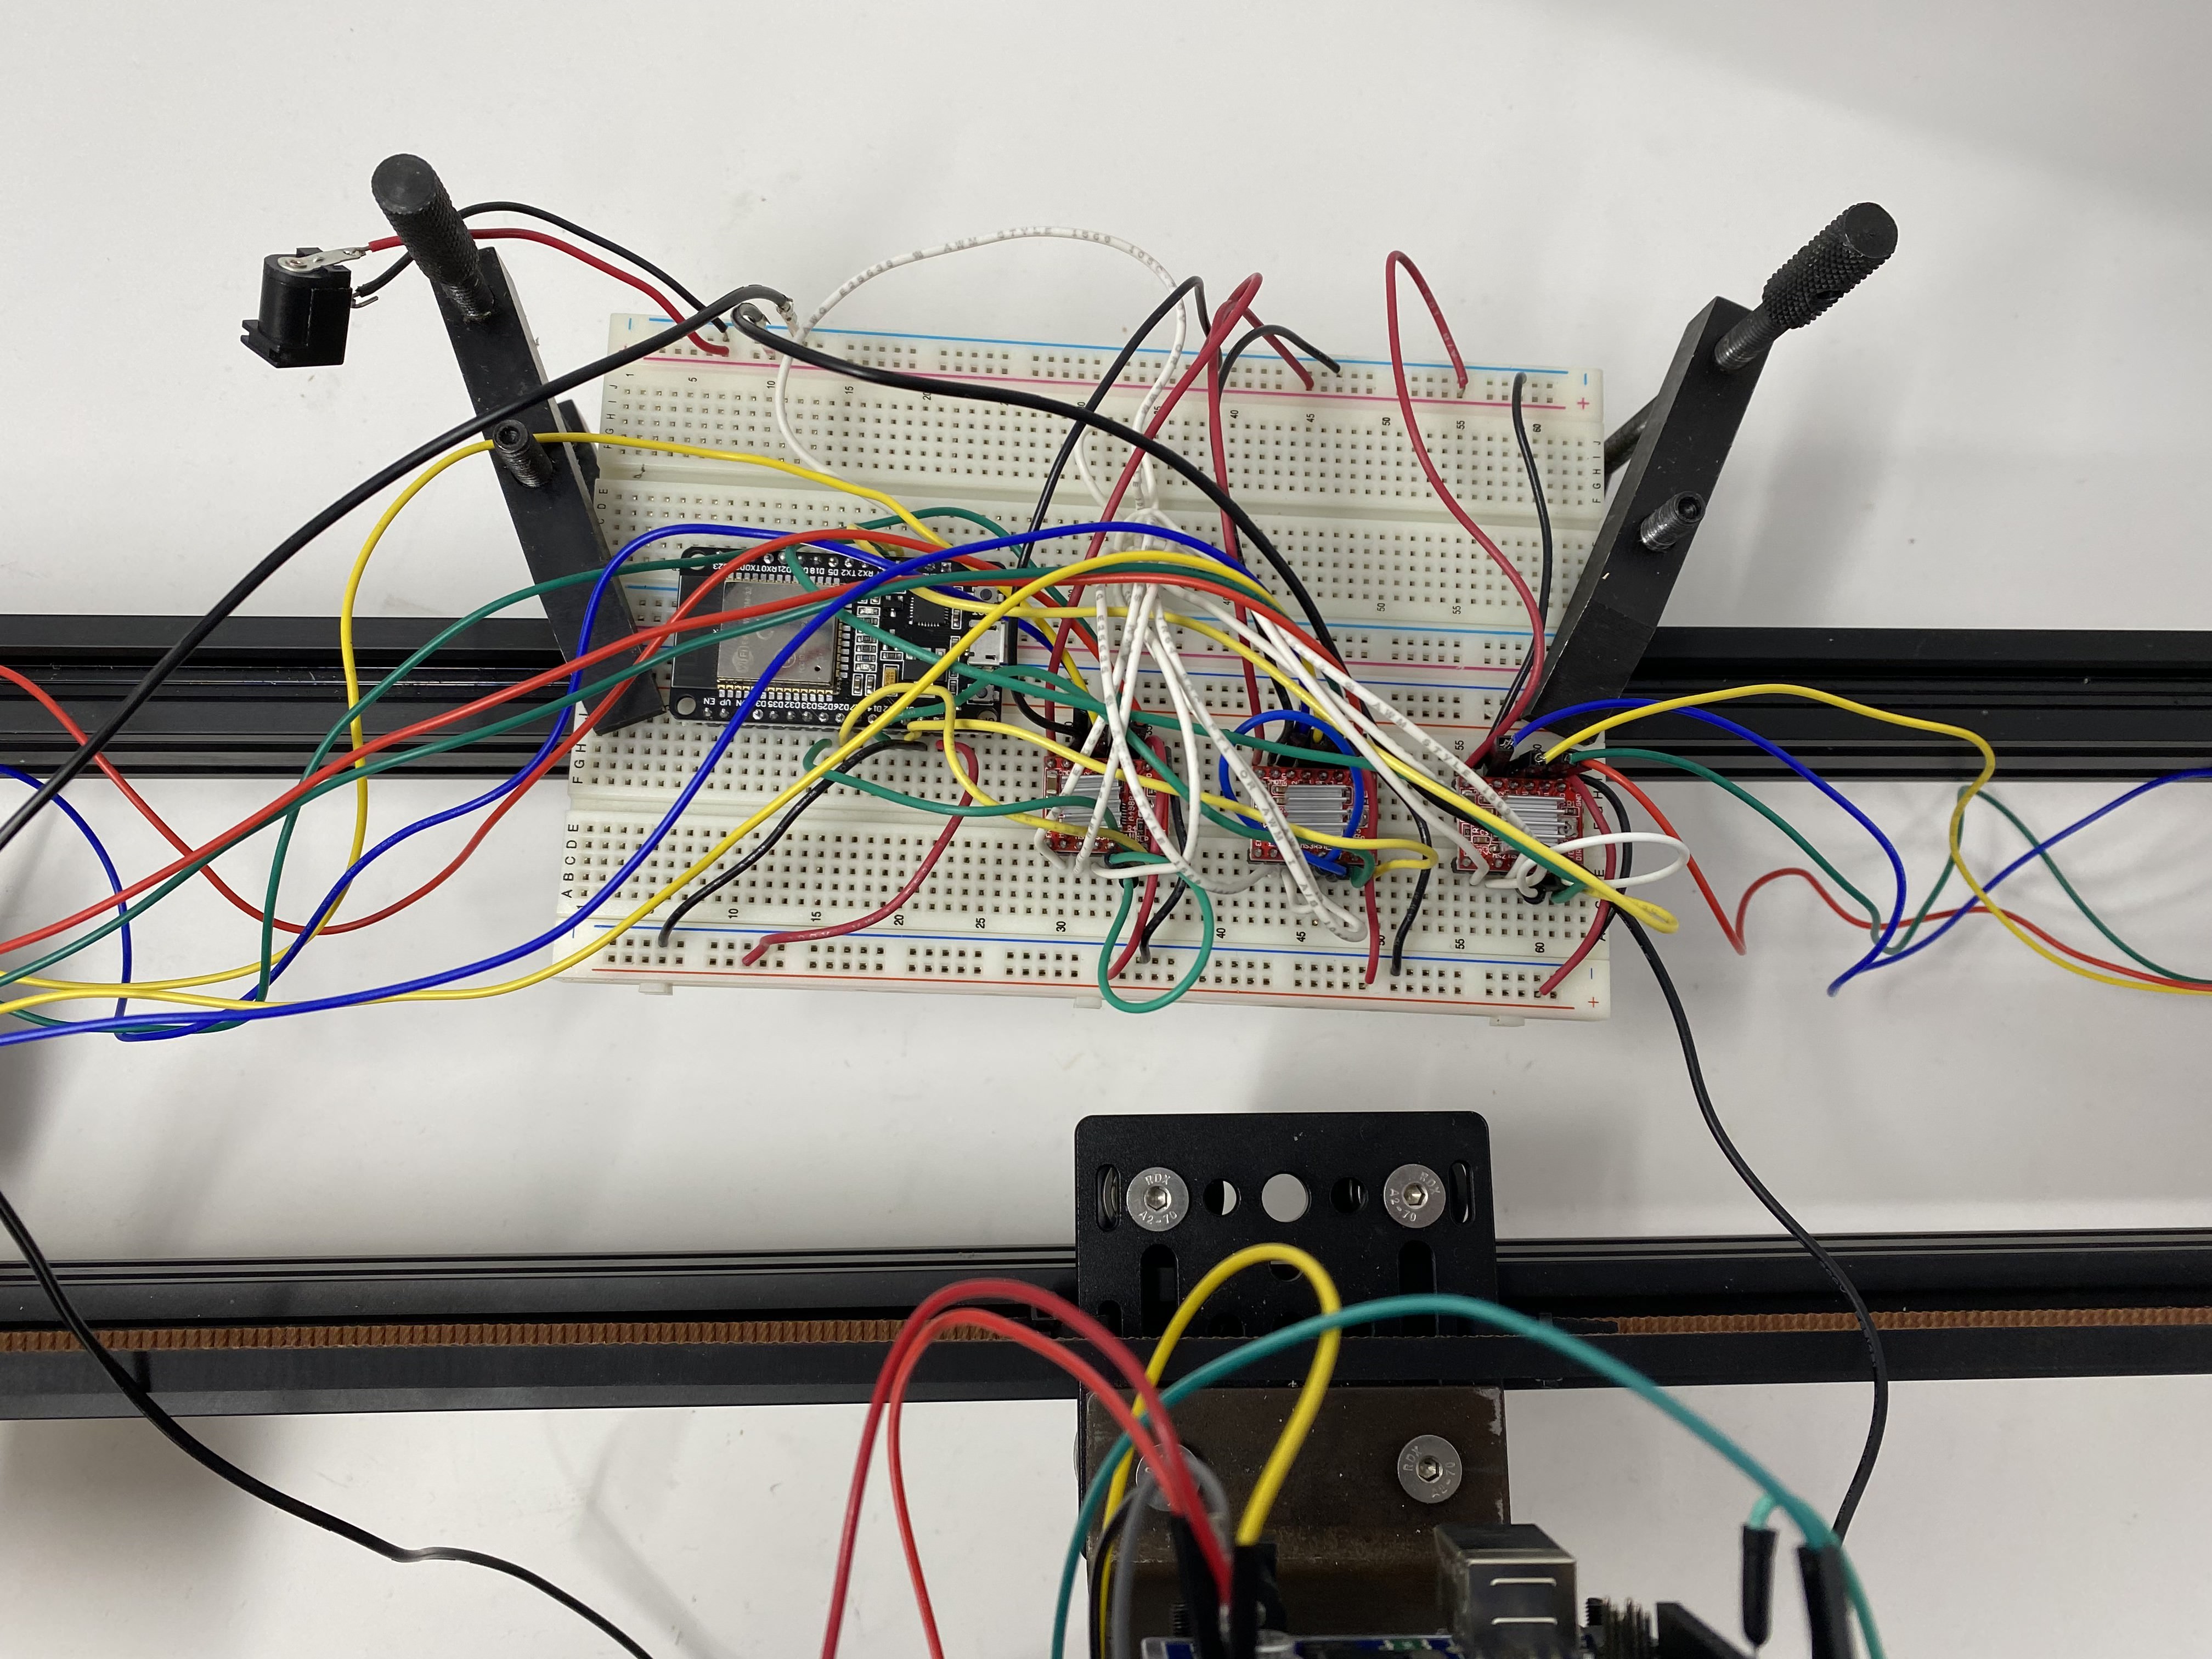
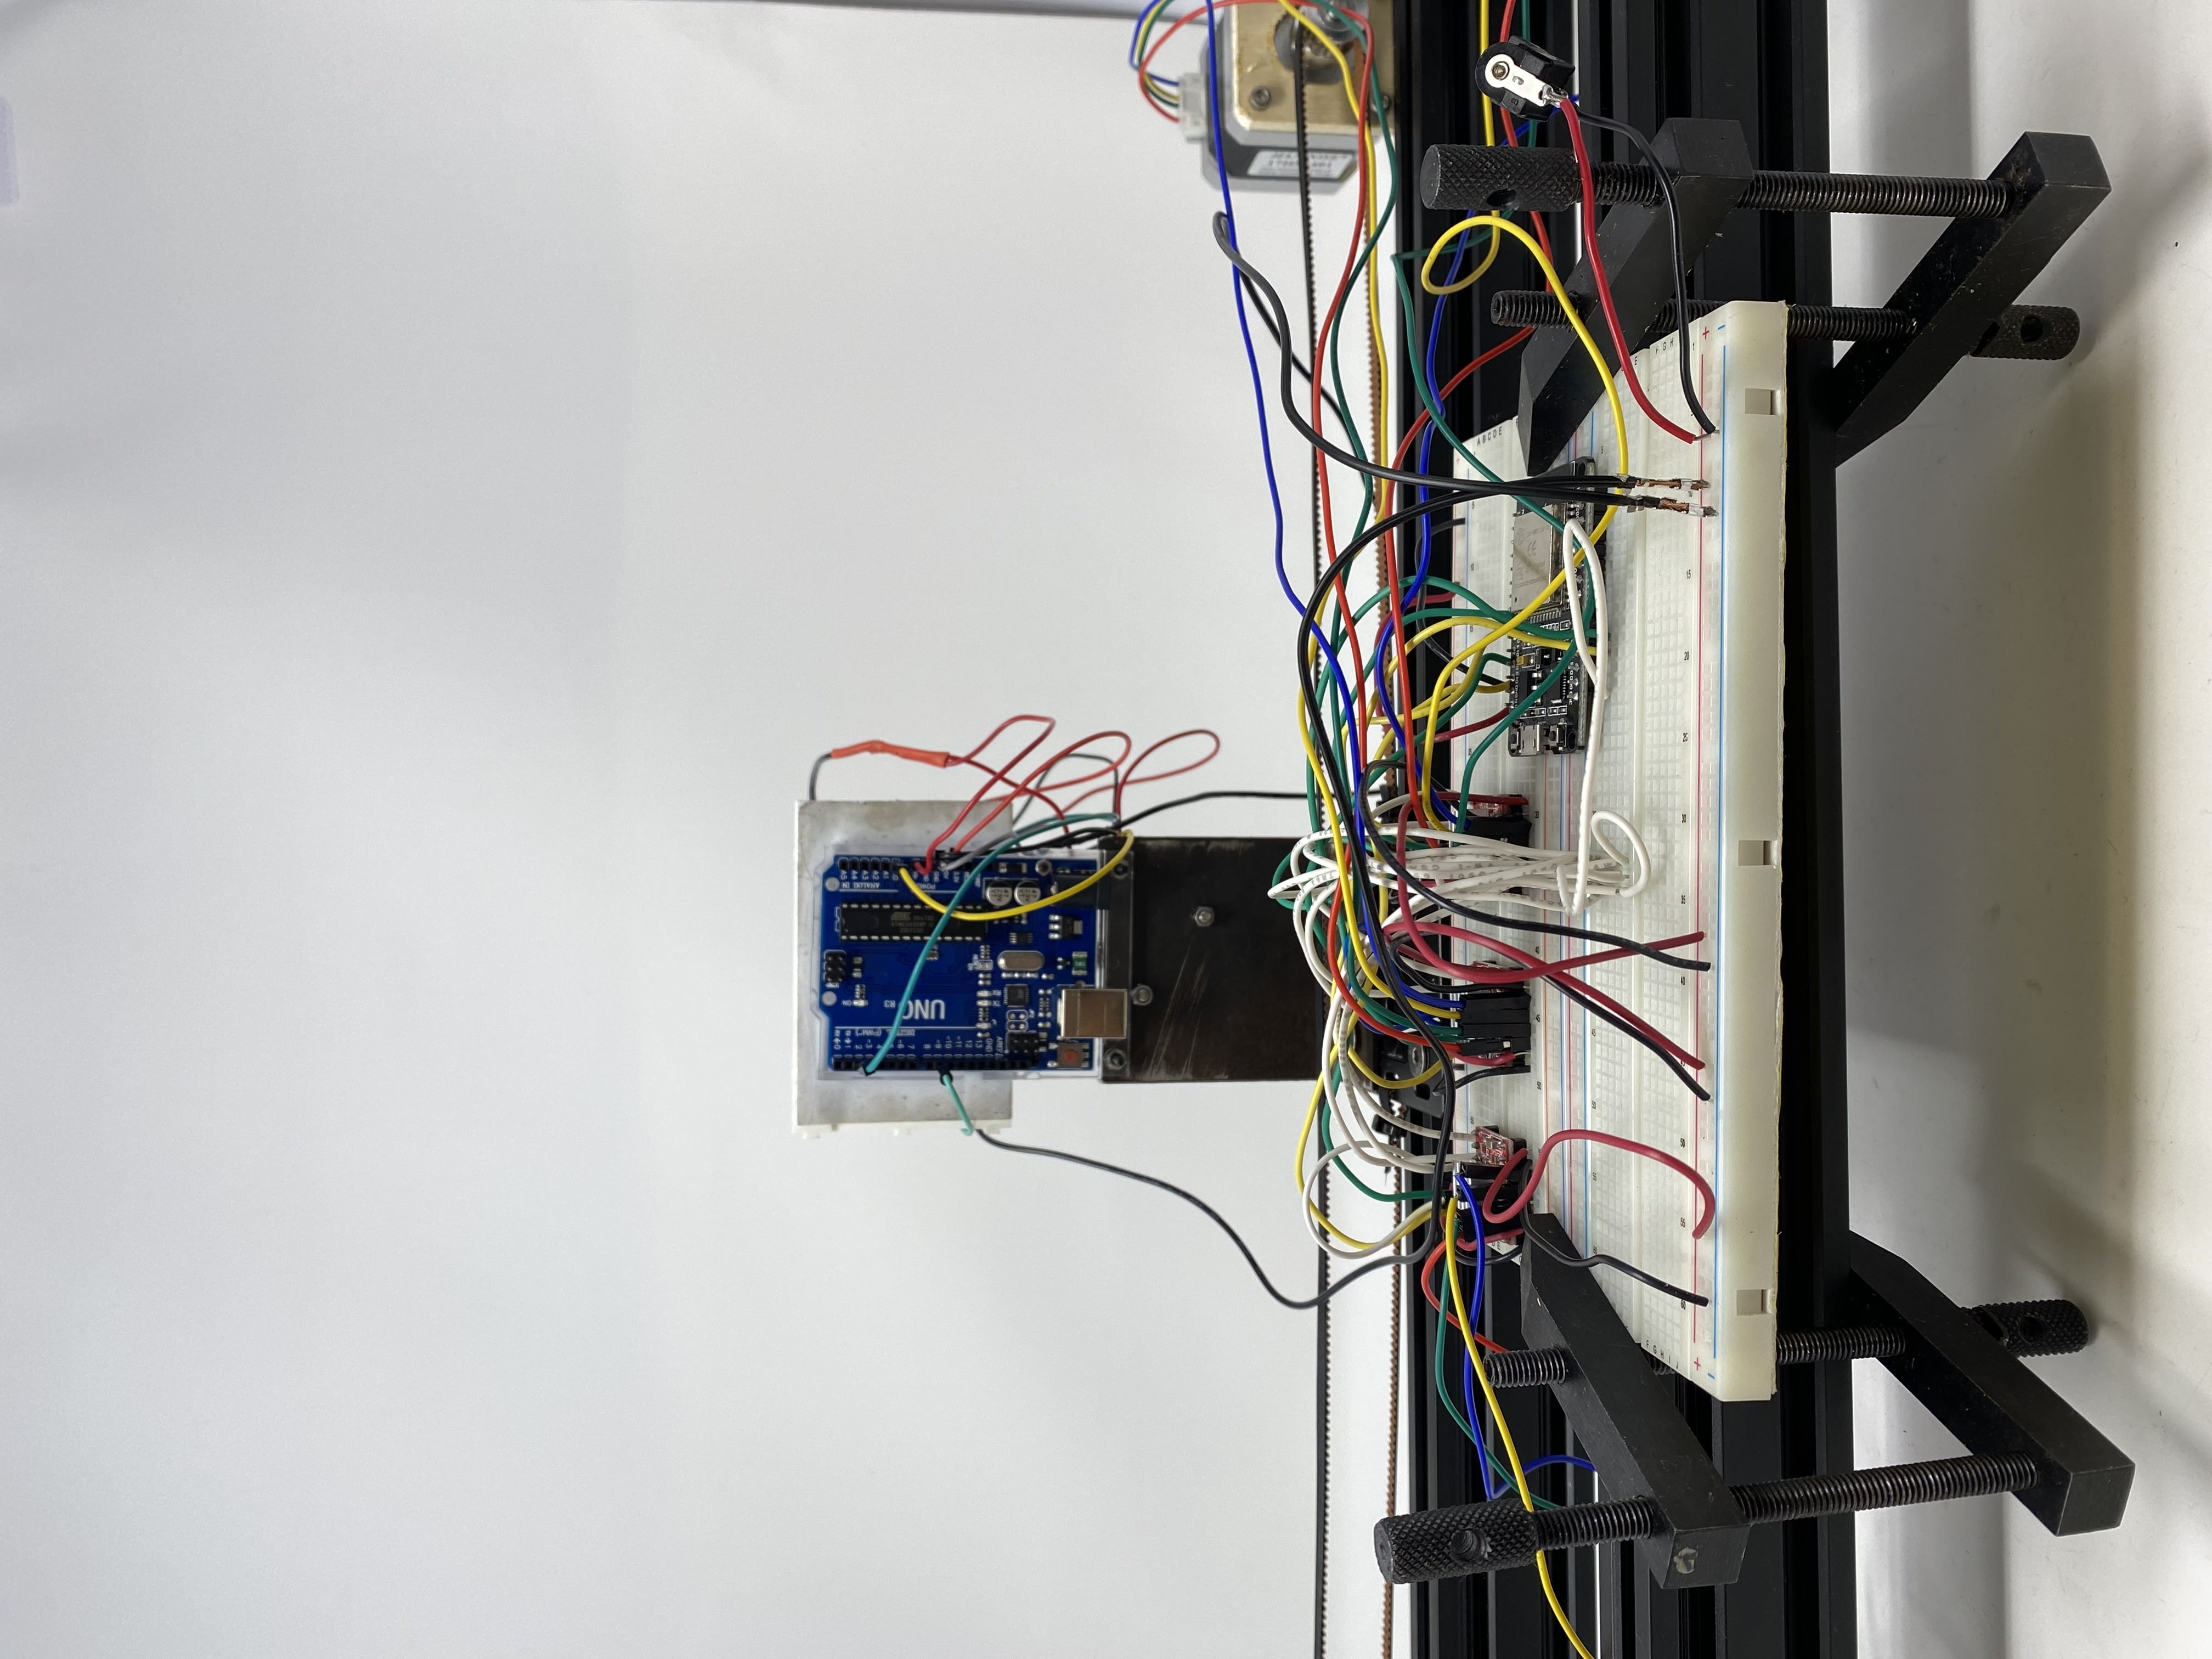
<span>Electrical</span>
In terms of coding, the program works by using AccelStepper to control our three stepper motors dynamically such that we can indicate the step size per motor for each command statement. Max acceleration and max speed were experimentally selected to achieve a relatively good movement.
In the first passthrough, we reset our motors such that we always try to start at the middle of our plotter. Then use an algorithm (colored red) that calculates [x, y] positions of a circle for a given radius dimension. At the top of the program, we indicate how many points we wish to have of our circle. Then in our loop, we have a function that loops through all the points and goes to them one by one to outline a circle. If we had more points, the more circular the circle looks like.
At the end, we tell the program to go back to the center. We have seperate code for the pointillistic marker!
Code for the pointillistic marker:
<pre><code class="language-arduino">
int solenoidPin = 9;
int buttonPin = 2;
int potPin = A0;
bool solenoidState = false; // Tracks the state of the solenoid
bool buttonStatePrev = false; // Tracks the previous state of the button
void setup() {
pinMode(solenoidPin, OUTPUT);
pinMode(buttonPin, INPUT_PULLUP); // Using internal pull-up resistor for the button
}
void loop() {
// Read the button state
bool buttonState = digitalRead(buttonPin);
// Toggle solenoid state only if the button state has changed (edge detection)
if (buttonState != buttonStatePrev) {
buttonStatePrev = buttonState;
if (buttonState == LOW) {
solenoidState = !solenoidState; // Toggle solenoid state
delay(200); // Debounce delay
}
}
if (solenoidState) {
// State 2: Solenoid moves up and down at a rate controlled by the potentiometer
int potValue = analogRead(potPin);
int delayTime = map(potValue, 0, 1023, 1000, 50); // Map potentiometer range to delay time
digitalWrite(solenoidPin, HIGH);
delay(delayTime);
digitalWrite(solenoidPin, LOW);
delay(delayTime);
} else {
// State 1: Solenoid stays in a fixed down position
digitalWrite(solenoidPin, HIGH);
}
}
</code></pre>
Code for the main machine:
<pre><code class="language-arduino">
#include <AccelStepper.h>
#include <MultiStepper.h>
#include <math.h>
#define NUM_POINTS 18
double coordinates[NUM_POINTS][2];
//step 25, dir 26 left motor
AccelStepper stepper1(1, 25, 26);
//step 4, dir 2 right motor
AccelStepper stepper2(1, 4, 2);
//step 12, dir 13 end effector
AccelStepper stepper3(1, 12, 13);
MultiStepper wheels;
int global_x = 0;
int global_y = 0;
void setup() {
Serial.begin(9600);
stepper1.setMaxSpeed(3000);
stepper1.setAcceleration(4000);
stepper2.setMaxSpeed(3000);
stepper2.setAcceleration(4000);
stepper3.setMaxSpeed(3000);
stepper3.setAcceleration(4000);
wheels.addStepper(stepper1);
wheels.addStepper(stepper2);
wheels.addStepper(stepper3);
}
void loop()
{
long positions[2];
generateCircle();
printf("Going to 0:\n");
global_x = map(0, -9, 9, -15000, 15000);
global_y = map(0, -9, 9, -12500/2, 12500/2);
positions[0] = global_y;
positions[1] = -global_y;
positions[2] = global_x;
wheels.moveTo(positions);
wheels.runSpeedToPosition(); // Blocks until all are in position
delay(100);
printf("Coordinates of the circle:\n");
for (int i = 0; i < NUM_POINTS + 1; i++) {
if (i == NUM_POINTS) {
printf("(%lf, %lf)\n", coordinates[i][0], coordinates[i][1]);
global_x = map(coordinates[0][0], -9, 9, -15000, 15000);
global_y = map(coordinates[0][1], -9, 9, -12500/2, 12500/2);
positions[0] = global_y;
positions[1] = -global_y;
positions[2] = global_x;
wheels.moveTo(positions);
wheels.runSpeedToPosition(); // Blocks until all are in position
delay(100);
break;
}
printf("(%lf, %lf)\n", coordinates[i][0], coordinates[i][1]);
global_x = map(coordinates[i][0], -9, 9, -15000, 15000);
global_y = map(coordinates[i][1], -9, 9, -12500/2, 12500/2);
positions[0] = global_y;
positions[1] = -global_y;
positions[2] = global_x;
wheels.moveTo(positions);
wheels.runSpeedToPosition(); // Blocks until all are in position
delay(100);
}
printf("Going to 0:\n");
global_x = map(0, -9, 9, -15000, 15000);
global_y = map(0, -9, 9, -12500/2, 12500/2);
positions[0] = global_y;
positions[1] = -global_y;
positions[2] = global_x;
wheels.moveTo(positions);
wheels.runSpeedToPosition(); // Blxxocks until all are in position
delay(100);
}
void generateCircle() {
int radius = 9;
double angle = 0;
double angleIncrement = 2 * M_PI / NUM_POINTS; // Angle increment for each point
int i;
for (i = 0; i < NUM_POINTS; i++) {
coordinates[i][0] = radius * cos(angle); // x = r * cos(theta)
coordinates[i][1] = radius * sin(angle); // y = r * sin(theta)
angle -= angleIncrement; // Decreasing angle to move clockwise
}
}
</code></pre>